Tuesday, December 15, 2015

Open-Ended Robotics Projects


Open-Ended Robotics Projects

Using robotics as a tool to solve problems and learn by trial and error is a lofty goal. However, well crafted design projects should allow students to accomplish these goals in addition to fostering  creativity and innovative.  If we are to allow students to do this, then we will need to establish projects that relate to real world problems.  

One such example of this is the Grade 9 UN Robotics project.  In this scenario, students will create a working robot that must demonstrate a service or prepare a product that would be considered helping humans as it pertains to one of the United Nations Millennium Development goals.  The United Nations has established 17 development goals which can be found here, http://www.un.org/sustainabledevelopment/# 

The student task is to think of a challenge that your robot might complete related to one of the 17 millennium development goals, some example might be:

a. Peace Keeping (example of a Challenge-retrieve and defuse a bomb)
b. Food Aid (example of a Challenge: deliver a food package across a area littered with landmines and hostile territory)
c. Environmental Aid- (example of a challenge-build a robot that can recognize and clean up recyclable materials in a developing country)

This video provides some examples of student designed robots related to the UN Robotic project.


Wednesday, December 2, 2015

Reflecting on My Trip To Robot Academy


What I learnt from my Trip to Carnegie Mellow Robotics Institute

The National Robotics Institute of Engineering and robotics centre is a Branch of Carnegie Mellon University and is located in Pittsburgh.  It is a world leader in robotics education, research and product development.  Since its inception in 1979 it has been ranked in the top 5 in the world for robotics research and product development.  They build robotics products for NASA,  like the Mars Rover,and the US military, like the Dragon Runner, which is an autonomous military robot that can be thrown into a building to provide surveillance.   the As a self-proclaimed geek who religiously reads magazines like Wired, Engadget and Popular Science it has been my dream to visit this mecca of all things “cool” for a long time now.  And my trip did not disappoint…..but not for the reasons I had first hoped for.

When we sign up for Professional development sessions whether it is a 1 hour talk or a week long workshop like mine, we often have preconceived hopes and expectations of what we want to learn.  However, within the first few hours and days of my journey to Pittsburgh it became clear that mine trip to Carnegie Mellon was not really about robots. 

When I arrived at the Calgary Airport at 6am Sunday Morning a huge storm had engulfed Calgary and surround area causing the airport to be shut down.  Sadly, flights were delayed and even cancelled, including my flight to Pittsburgh.  My first German instinct was to line up like hundreds of other stranded passengers and demand to be put on the next flight out.  However, after a soothing latte I thought better and headed back home leaving the chaos behind to collect my thoughts and figure out what would be my next move.  When I got home, much to the surprise of my family, I had received an email from Air Canada saying they had put me on another flight at midnight.  After great patience and some resiliency traveling through the night, I arrived at Carnegie Mellon Institute only a few hours late for my first session. 

Little did I know that my experience at the airport was foreshadowing for what I was to encounter in my workshop.  Because I entered the session late, teachers were already working on programing their robot for their first of many challenges.   The workshop was very hands-on and it allowed us to use the robots to complete increasingly complex tasks.  But, upon reflecting on what I was doing it became clear to me that  what I was really learning when working on my own and with teams was how to problem solve.  Coding and programing robots to complete complex functions consists of trial and error, fortitude and patience.  Learning the code and building the robots was stress-free when working with colleagues.   Getting the robot to actually execute each of the challenges was sometimes frustrating and time-consuming.   This is exactly what happens to my students in design class.  As you can see from this short video, nothing ever works the first time, when programming. 
 
Although my job is to teach them coding my bigger job is to teach them ATL skills like resilience and perseverance.  


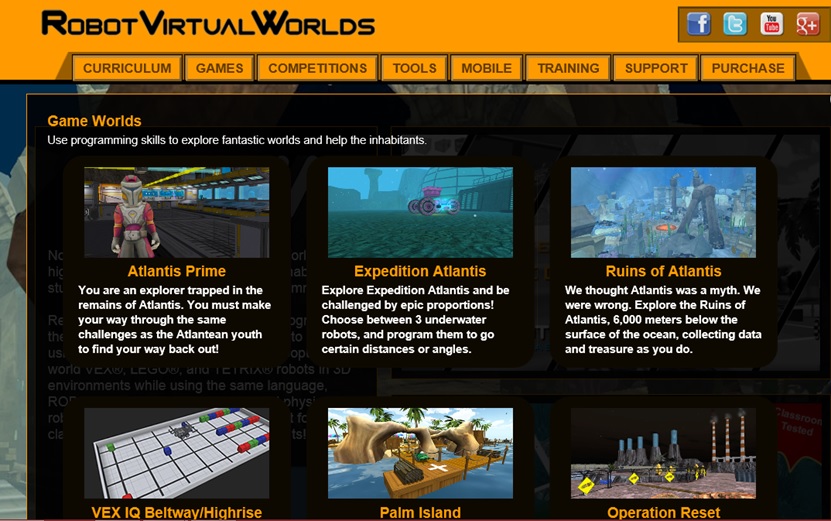
One tool to help students with learning by failure is Robot Virtual Worlds.  This online platform enables students to work through various programming challenges in a simulation type environment.  Some students a willing to take more risks if someone is not watching them.  Robot Virtual world has a variety of different games and challenges which increase in complexity and scope.  Student receive feedback as they move through various levels and stages of the challenge.  My favorite is Beltway High-rise whereby competitors have to travel around the game board the stack blocks to building a high-rise tower using various motors and sensors. 

Although I had intentions of heading to Pittsburgh to learn all I could about Robotics, after spending some time touring around, I also quickly realized that I learnt far more than what I had first imagined.  For example, I learnt that in some places in the world, CHURCHES CAN INCLUDE BEER. 
This is a picture of the famous Church Brew Pub.  I was an old Catholic church that was converted to a brewery.   I don’t know about you but I personally would attend mass more often if this was a staple at my local church.

Like church and beer, it also became clear to me that robotics education is more than learning to program and code.  There are a host of other disciplines that are needed for students to excel at solving problems using robots.  Firstly, when learning to write code, students need to ensure they use something called pseudocode which helps them organize their ideas, commands and functions.  If a there is a problem associated with your programming, finding it can be difficult, unless you are using pseudocode.  Secondly, students need a strong understanding of math principles.   For example, in order to program the robot to travel a specific distance, students can calculate the circumference of the tires and use ratios to solve for any distance. 

In conclusion, I went to Carnegie Mellon to learn more about robots, but came home realizing I learnt so much more.  Robots, like any other technology is another tool that we use to teach 21st century skills like communication and problem solving.  That said, technology is here to stay in our world, it affects everyone and every industry whether it be movies, phones, medicine, or politics.  Frank Levy and Richard Murnane, in their book titled “Dancing with Robots”, make the argument that all schools should be teaching programming as a tool to solve problems as our future will depend on it.


Monday, July 20, 2015

Robotics in the Classroom: A few Tips

After completing a five day professional development session at the prestigious Carnegie Mellon University on robotics, I felt motivated to reflect
on my experiences and thoughts on robotics in Education.

Although there have been many fads and trends in education, I believe that when we find a tool that enables students to engage in meaningful learning, it will not fall victim to a trend.   Robotics is the ideal organizer for engineering education: students learn math, science, technology, problem solving, and communication skills in a context that is interesting, relevant, and fun.

Here are two ideas when developing a vision for your robotics program at your school:

1.  Expose students to a Variety of Experiences that Increase in Difficulty

If you are a strong advocate for robotics education, then you will likely, like me, find a way to incorporate learning into the day to day curriculum.  Although there is merit to offering the after school clubs and competitions, providing robotics as a class will inspire more students.

Assuming this is possible, lets talks about how this experience might progress in your school so that students are getting varied opportunities and are being exposed to a thoughtful scope and sequence. At our school, students are guided through the following levels to allow them to be exposed to a variety of robots and programming:

Grade
Type of Robot
Type of Programming
Useful Links
7
Scribbler S2 Robotics

Gui Graphical Program system
8
Lego Mindstorms EV3 and NXT Robotics
Lego Robots (NXT and the newer EV3) offer a more advanced graphical Software program
Other useful Links
9
VEX IQ Robtics Systems
Robot C Graphical Programming

Whilst this is how we progress our students through robotics at our school, there are several iterations and possibilities.  The important thing to understand is that students should be exposed to a variety of robots and be allowed to progress and advance in their programming and building skills.

2. Invest in Robot Virtual Worlds

Robot virtual Worlds are simulation environments that run virtual LEGO and VEX robots that are programmed in the same languages as physical robots (ROBOTC, NXT-G, LabVIEW, EV3).  

Check out the video on the front page of http://robotvirtualworlds.com/

Why Robot Virtual Worlds?
  1. Many classrooms don’t have enough robots for students.
  2. Very few students have robots at home to do homework or make up missed classwork.
  3. Often robotic teachers are pulled away from the classroom to do field trips and require a substitute teacher who has limited background knowledge in programming robotics. 
The Robot Virtual Worlds Project tackles all of these problems by allowing students to program virtual robots using the same programming software.

Robots are here to stay.  Although I doubt they will ever take over the world as depicted in some movies such as I-Robot and Terminator, I believe the more exposure we provide for students the more likely they are to find useful and powerful ways robots can be used in society like Bay-Max in Big Hero 6. How does your school implement robotics?

Sunday, March 15, 2015

Personalizing the Design Process with 3-D Printers


“Today you are YOU, that is TRUER than true. There is no one alive, that is YOUER than you.” (Dr. Seuss)
When Dr. Seuss wrote this statement, he was speaking about the uniqueness of each individual and encourages us to be our own person.  This quest for individualism and personalization has grown even deeper in North American society since Dr. Seuss wrote this statement many years ago.  Thanks to Apple, we now have watches that track our individual heart rate, fitness levels and health.  The movie streaming company Netflix allows us to personalize our movie viewing experience and the Starbucks App can know what kind of coffee or latte we prefer before we walk in the door.  Technological advances are making it easier and easier to live our lives the way we want it to be.  With the growing popularity of the 3-D printer, student designers will be able to learn how to make products that cater to an every growing demand by individuals to make things personal.

Our school just recently purchased three 3-D printers for our Middle School Design Classes.  I have been planning out how I will introduce this emerging technology into my Design Classes for next year.  As is the case with any unit of study in design, it is necessary for students have the technical skills in order to use the design cycle to create a quality product.  We cannot assume students will be able to acquire these skills as they are working on the project.  So, before I embark on an Inquiry project or Design Challenge, I spend several weeks UPSKILLING.  For example, before we work with the Lego Mindstorm Robots on an open-ended design challenge, I work with students on how to use the motor block, the touch sensor, the light sensor and the ultrasonic sensor.  In the case of the 3-D printer, I plan on teaching students how to use the CAD programs Google Sketchup and TinkerCad.  Furthermore, I want to give them ample practice printing off objects and trouble shooting before we embark on a Real-Life design challenge. 

Here are some ways that I plan to introduce the use of 3-D printing into my Middle School Design Classes and give them the UPSKILLS necessary to feel successful on a more complicated design challenge (which is listed at the end).  *Please note that I do not plan to do each and every activity listed below before we start a specfic design challenge. 

Sample Introductory Skills

1.       Downloading a file from Thingiverse and adapt it in TinkerCAD or Google Sketchup

a.       Example 1, phone case that is then personalized with their name on it.

2.       Create your own simple/basic geometric object in Google Sketchup or TinkerCAD,and then print it off using the 3-D printer examples:

a.       Keychain

b.      Luggage tag

c.       A New Canadian $5 Coin

d.      A bubble Blower

e.      A Trophy for the Winners of:   Middle School Dodgeball or Soccer Tournament

f.        Die or Cube with words on each side

g.       New type of Lego Brick

h.      K’nex parts

3.       Design a puzzle in Google Sketchup or TinkerCad and then print off ex. Tangram or Picture Puzzle

4.       Design a Spinning Top in Google Sketchup or TinkerCad and print it off to see which will spin the longest

5.       Design a Hover Craft on Google Sketchup or TinkerCad and print it off (powered by a balloon) and see how far it will float on air

6.       Create a Custom Picture frame using Google Sketchup or TinkerCad and print it off

Sample Developing Skills

7.       Create a mold in Google Sketchup or TinkerCad and then print it off so that can then be filled with a material:

a.       Food mold

b.      Spray foam insulation mold

c.       Silicone mold

8.       Scan an object using the Matter and Form Scanner or 123D Catch, edit and clean up (maybe modify) and then print

This is a 3-D scan of my head created using 123D Catch
a.       Example- a statue, sculpture, animal, action figure, head of a person

b.      Toy improvement Project (My toy is Brocken, fix it)

9.       Create a Functional Object that might serve a need or purpose to solve a problem

a.       Ex. Children’s toy of a 1-2 year old?

b.      Ex. Toy for the Physically Challenged

c.       Ex. An Athletic support ex. Brace,

Sample Advanced Skills

10.   Create an object that contains more than one piece or part that must then be assembled

a.       Example:  create a simple car complete with axles, wheels that can be assembled

11.   Create a more Organic/curvy shaped object using Sculptris (3-D sculpting program) and then print off

a.       Ex. Superhero/Action figure

b.      An organism adapted for a certain environment Ex. Mars
Once students have developed the necessary technical skills and have practiced using the 3-D modelling programs (Google Sketchup and TinkerCad) and the 3-D printer, it is time to introduce a more open-ended Inquiry Project.

Inquiry Project- The Child Friendly Syringe - An inquiry into how we change children's feelings toward needles


One such inquiry project could be to have students focus on improving the health and wellness of children by using the Design cycle to investigate the issue of how to get children to passively receive needles by designing a Child Friendly Syringe. 

Big Ideas;  Personal and Cultural Expression: the way we express our feelings, Communication, (adaptation and Form)
Goal:  The adapted form of a product can change the way we express our feelings. 
Role:  You are a Medical Design Expert
Audience:   Your product will be evaluated by Nurses, Mothers/Fathers and small children under the age of 3 years old.
Situation:  The Canadian Nurses Association claims that one of the most difficult parts of their job is dealing with small children who have a fear of needles.  Although the association has some tips and tricks like putting numbing cream to partially freeze the surface of the skin before injecting medicine, sometimes the anxiety levels of small children are so high that it is difficult to get them to hold still.  If only there was an easier way to administer medicine within the syringe.
Product:  You will use Google Sketchup or TinkerCad to design and then 3-D print a working prototype of a more Child Friendly Syringe that might help small children overcome their fear of needles. 

Possible Resources

1. CAD Programs

TinkerCad- https://www.tinkercad.com/

Google Sketchup-http://www.sketchup.com/products/sketchup-make

123D Catch-http://www.123dapp.com/catch

NetFab- 3-D modelling program used to detect errors in 3-D objects and clean them up before printing, http://www.netfabb.com/

Meshmixer-3-D modelling program used to detect errors in 3-D objects and clean them up before printing, http://www.meshmixer.com/

Sculptris- 3-D program to make more organic shapes, http://pixologic.com/sculptris/

2. Warehouse of Sample 3-D Designs that can be Printed

Makerbots Thingiverse- http://www.thingiverse.com/

3-D Downloadable and printable Materials- http://www.yeggi.com/q/lesson+plan/8/

3-D Lessons Plans, Project Ideas- http://u.tinkerine.com/en-ca


Sunday, September 21, 2014

Start the Year with a Game

"The way to get started is to quit talking and start doing".  (Walt Disney)

As most schools enter their first few weeks of school, you can bet that many teachers have passed out course outlines and methodically mapped out with students their topics, class rules and details on assessment.  This ritual at the beginning of the year has been a familiar routine for most in middle school and high school.   

Yet, I wondered if there was a new way I could start the school year.  As students enter the building after many weeks of play and relaxation, I want to "wow" them and hook them into thinking that coming back to school was a good thing.  Yet, I am realistic and know that it is important for students to have an overview of my class.  So, I brainstormed ways I might "marry" the idea of instilling a sense of excitement into the students on the first few days and also ensuring they are aware of my course content and philosophy.  The result was to turn to a game.


Board games like Sorry and Monopoly offer many educational benefits to the classroom.  These may include:

1. Being able to follow the rules and instructions to achieve a goal.
2. Building social skills like fair play and teamwork.
3. Developing interpersonal skills through conversation and ice breaking talk during the game to get to know each other.
4.  Thinking skills are fostered as most board games have a element of strategy.


Thus, I decide to build a board game that would afford my students the opportunity to learn about my course outline and at the same time get to know each other and build on other learning skills.  After much search on the internet, I found a great blog by Kat Okula, who posted a way to re-design a Monopoly board.  So, I changed it to fit my course on Design.  


Here are the steps I went through to create my own Customized Monopoly Game:

1. I re-worded the properties on the board game so that they were indicative of some of the themes, topics and ideals that were part of my Design Class.  For example, Inquiry AVE, Asssement AVE, etc.  You can see a large copy of my board game here.

2. I re-worded all the property cards in two ways.  Firstly, I changed their title to match the properties on the board game.  Secondly, I added a question to the property cards.  If a student wants to purchase the property they must correctly answer the question on the property card first.  If they get the question wrong, it goes back into the pile. You can see samples of the property cards here (they will look misaligned in google drive, but when you download them they should look formatted properly).

3.  I re-worded the Chance and Community Chess cards to reflect possible situations that might arise in a school setting.  You can view a sample of these cards here.

4.  I found game pieces from objects around the classroom ex. paperclip, eraser, etc. for the game board players.

5. I purchased Monopoly money from the local dollar store, or you can print your own here.

The 'Design-opoly' game adopts most of the same rules of a normal Monopoly game with a few exceptions or changes:

a)  Students cannot purchase a property unless they answer the question correctly on the property card.
b) There are no houses or apartments to add to the properties.
c) One person should be designated as the banker and property manager; their role is to manage the money and property cards.  It would be difficult to both play and do this job because the questions on the cards need to be kept private.

Besides using this game at the beginning of the year, it would also be beneficial as an additional activity when students have completed work or a project and need some enrichment.

I hope your students have as much fun learning about the fundamental concepts of your courses as mine did.  Please let me know about your experience.

You can access additional files I used to make the Design-opoly game here.

Wednesday, April 30, 2014

Transforming Information Using Infographics


Introduction
The great Aristotle once said, "There can be no words without pictures."  Although he was probably not talking about the engaging power of infographics, I would like to share with you my ideas on how to create these wonderful visual tools.
Infographics are graphic visual representations of information, data or knowledge.  They are intended to present complex information quickly and clearly.   Infographics take important events and data and tell a visual story. Furthermore,  infographics may also use typography (fancy and appropriate fonts) to transform data in an interesting visual format.  Here is a great explanation of infographics by Kathy Schrock,


Using Infographics in the Classroom
Having students develop research questions and then portraying their synthesized answers in an infographic is a very valuable learning experience.  Students will develop the following approaches to learning skills:
a. Organize and depict information logically
b. Use and interpret a range of discipline-specific terms and symbols
c. Collect, record and verify data
d. Present information in a variety of formats and platforms 
e. Collect and analyse data to identify solutions and make informed decisions 
 Here is an infographic about Infographics by infolicious:
Infographic About Infographics

Explore more visuals like this one on the web's largest information design community - Visually.

Steps to Creating an Infographic with Students
a. Come up with a compelling challenge- Research has show that students are more engage when they are solving real world challenges.  The more we can anchor our assignments based on problems the world is already facing the better.  To do this, stay abreast with current events going on in the world.  I watch the news and read various online publications so that I am aware of current issues.  Then, I turn these issues into a real world challenge.  Here is an example of one I created for my grade 7 science students on a unit of inquiry related to plants: (you can access my complete plant assignment here).
Design Challenge
There has been a growing trend by consumers to purchase less and less of certain types of plants in Canada.  The farmers of these plants are having a difficult time making a living.  They have petitioned the government of Canada to do something about this alarming trend.  You have been hired by the Government of Canada to create greater awareness toward one of these particular plants by creating an Infographic.  Your well-designed infographic will hopefully generate greater interest in the plant and help farmers of these plants create more business.
b.  Create Clear Instructions-
 It will be important to provide detailed procedures and instructions for students when they are making an infographic for the first time.  The more you are able to scaffold the process the greater success students will feel.  Here is a sample a procedure:
Step 1- Pick a Topic from the list of topics below.  Here is a list of possible topics to create your infographic about. 
__________________(these topics will depend on what your unit of inquiry is about)_____________________
Step  2- Generate 3 Questions-  What inquiry questions will you address in your infographic about your topic?  Questions should lend themselves to pictorial and graphical information.  For example, where in the world is it found? How is it processed? What are the most popular types? What is it made of?  Please come up with 3 questions that you will represent on your infographic page.
Step 3- Gather your data/information- Research your questions and gather your data, facts and information regarding your questions.  Remember to cite your resources in MLA format.
Step 4- Chose 3 ways to transform your research questions into visual information.  Examples include: a visual timeline, a graph (pie, histogram, pictograph, bar, line etc), a visual map, a unique image, etc.  The easiest way to do this is using an website that allows you to create the infographic using a template.  Here are 2 sites that do this:
Step 5-Customize your page layout: Edit your page by putting in your title, data and any new images you need.
Step 6-Save your template as a jpeg or image file.
 c. Choosing the Right Program-  Several factors will determine what type of program you use to create your infographic.  Age, level of technology experience and time are three factors that will help you decide what you will use.  Here are possible levels:

1. Beginner-  if you are working with upper elementary or middle school students that have never created an infographic before then I recommend they use; a)       https://magic.piktochart.com/  or b) http://www.easel.ly/  (here is a great tutorial on ease.ly).   These programs make it very simple and easy to generate infographics as they have tools and templates that will enable students to transform data and information without any prior knowledge.  These two programs are also helpful if you can not afford a lot of class time toward this project.

2. Advanced- for students that have experience with infographics and/or computer graphic programs that use layers, then they will appreciate having more control over their design by using a program like a) Adobe Photoshop or b) Adobe Illustrator.  This more advanced method requires much more time.

In the 21st century, we are presented with more and more information in visual format.  People are becoming more accustom to reading visual based information then straight text.  Thus, if we want to get our message across in an interesting and engaging way, then infographics is a great tool for students to learn how to create.  What has your experience been with creating infographics?


Additional Resources

1.  Ways to Teaching using Infographics
2.  Basic Infographic tools for teachers
3. Why should Teachers use Infographics?
4. Five Great Tools for Creating Infographics


Thursday, February 20, 2014

Fostering New Ideas by Adding "Perspective" with Google SketchUp

American author, Chuck Palahniuk once said, “The trick to forgetting the big picture is to look at everything close up.”   But finding new perspective whether it be about life or solving a problem is never easy.  We sometimes need to look to new tools and techniques to give us a different viewpoint.

Image Labeled for Re-use on Flickr  by Sadie Hernandez
Although Palahniuk was not speaking specifically about design projects, I feel this quote is an appropriate segue to talking about an amazing program I am now using in my Middle School Design classes; it is called Google SketchUp.  Google SketchUp, a free downloadable program, allows users to create 3D models in an engaging 3D environment.

One of my motivations to learning how to use Google SketchUp is to teach and coach my design students how to take their 2-dimensional architectural drawings to a new level.  As part of the design cycle, students are asked to create several feasible designs for a solution to a problem or challenge.  These usually involve sketching various 2-dimensional ideations/versions for a specific model in form of blueprints like the ones seen here of a model train car.

2-Dimensional Blueprint of a possible Indian Train Car
Then, students are asked to analyze each labeled sketch or blueprint and justify which one they might build.  From here, students pick one solution and elaborate a bit more on it's form and function by putting in further details and features before they move to creating the product.  This is often a difficult step for students as they have a hard time coming up with new ideas to further enhance their detailed blueprint.  However, with Google SketchUp, students might now take one of the 2-Dimensional drawings and create a 3-Dimensional version of it in Google SketchUp.  This is a superior approach to elaborating on their proposed solution.  When expanding a model into a 3-Dimensional program like SketchUp, students will be forced to have new "perspective".  Google SketchUp has several features that will empower young designers to look at their possible solution from  "new eyes".  Some new understandings that students may develop from expanding their proposed solution into a 3-D drawing are:

1.  What does my product dimensions look like  when in 3-Dimensional format?
2.  What does my proposed product look like from various angles? (top view, side view, etc)
3.  What are some of my aesthetic options?  Color, texture, shape
4.  Where is the most effective/strategic location for this  seat, coach, fountain, etc.?

My son and I worked together with Google Sketchup on building a model of the Alberta Legislature Building.  You can see the finished product here:


We had to pay attention to several details in order to make the model historically accurate.  As we were translating our ideas into a 3-D model, a fresh perspective enabled us to learn far more than we imagined.  For example, there is a large circular fountain  at the entrance to the building.  When we sized and created the fountain, we noticed that made it difficult to walk around the fountain to get to the entrance to the Legislative Assembly.  We both wondered why the designers would want to make the journey so narrow and difficult.  After much discussion about security, we realized that this might be intentional for security reasons.  Furthermore, from above we noticed that the Building is in the shape of a cross, which  has significance based on the religious affiliation of the original designers and architects. 

Stepping back, taking a breath and finding a new perspective is often a difficult mental task.  Yet, with the right tools, we can teach students to see things differently and therefore develop allow them to develop new ideas.  What techniques and tools do you employ to help students develop new perspective?

If you are interested in using Google SketchUp to give your students new perspective here are a few sights that might be helpful:

1.  Google SketchUp Download

2. Free video tutorials to learn Google SketchUp

a) http://www.sketchup.com/learn
b) Google SketchUp for Dummies by Aidan Chopra

3. Sample Lesson Plans using Google SketchUp

4. For the complete PDF version of the 3DVinci Google SketchUp Teacher Guide, go to:
http://www.3dvinci.net/teacherguide/teacherguide.pdf

5.  Video Presentation by Joe Donahue on the use of Google SketchUp in the Classroom